You’ve come to the right place if you need to know how to set the IPD on Meta Quest 3S. Setting the correct inter-pupillary distance, or IPD, is one of the key pillars of having a good VR experience. When your IPD is set incorrectly, it can cause nausea, headaches, and dizziness. It can also make it difficult to slice blocks accurately in Beat Saber because your brain can’t deduce the proper distance between objects.
The Meta Quest 3S’s IPD adjustment method is quite different from other VR headsets on the market, so we’ve put together this guide to help you find your ideal IPD preset as well as some hidden tricks to enable additional IPD settings. If you have a Meta Quest 2 (formerly known as the Oculus Quest 2), these steps will also work for that headset.
How to measure your IPD
In order to measure your IPD, you’ll need two things: a ruler with millimeter markings, and a mirror. Any ruler will work so long as it has millimeter markings, but you will want a hard ruler instead of a flimsy tape measure to ensure accuracy.
- While looking in the mirror, close your left eye.
- Look straight into the mirror at your right eye with your right eye.
- Hold the ruler just below your eye and center the zero marker on your right pupil.
- Close your right eye and open your left eye, making sure to not move the ruler.
- Look into the mirror at your left eye with your left eye.
- Look straight and note the millimeter distance that matches up to the center of your left pupil.
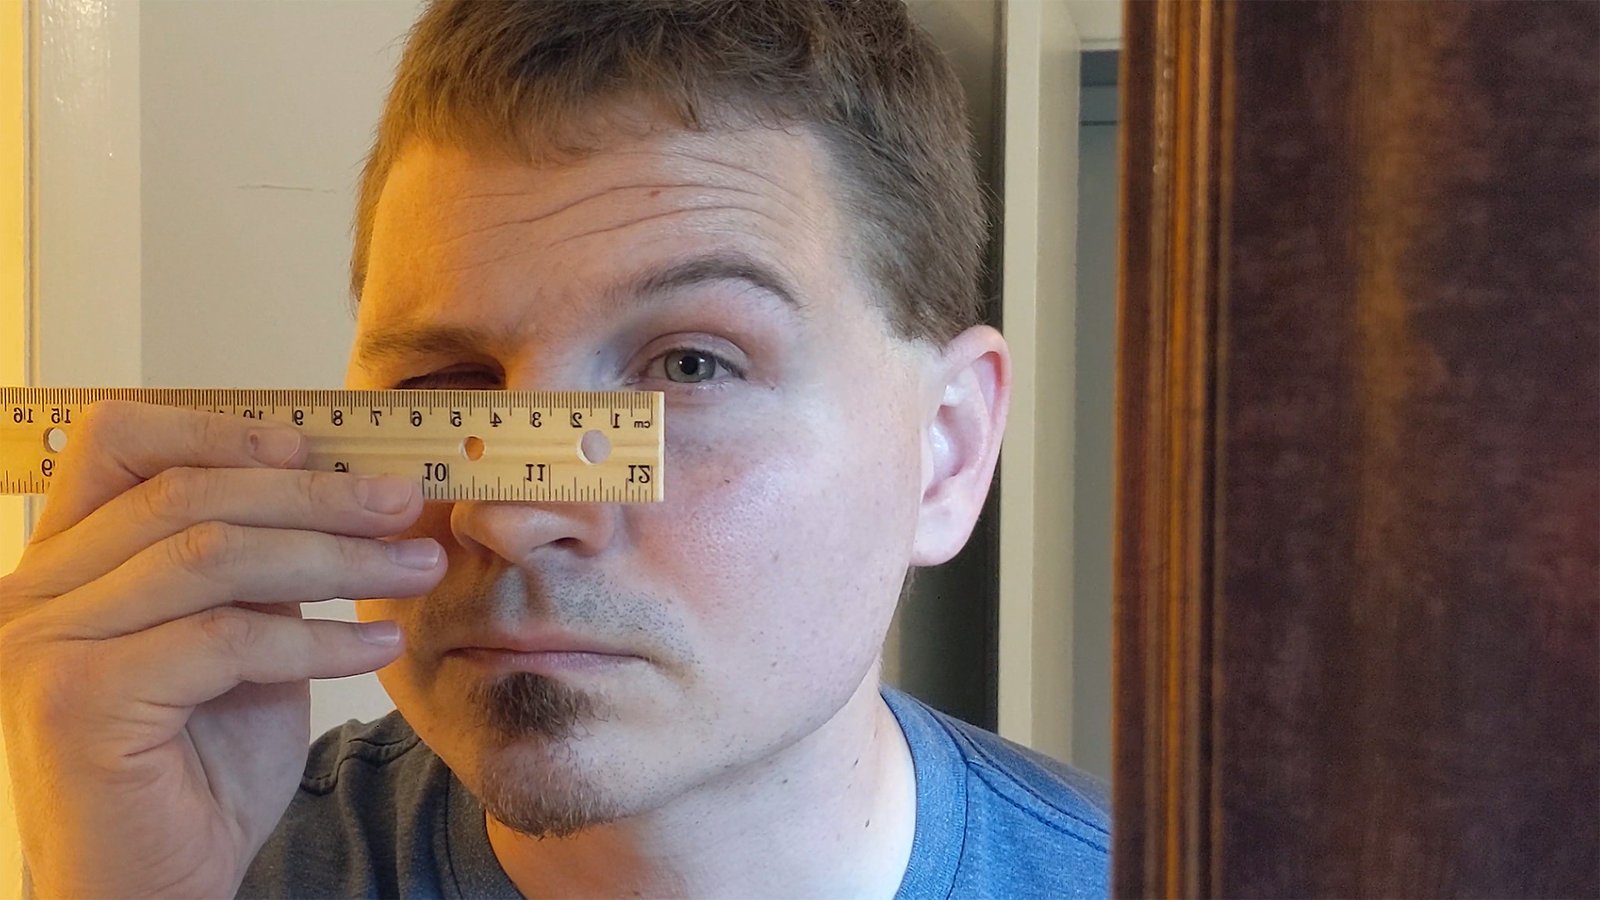
For example, my IPD is 66mm. The average IPD sits around 63mm, but can range between 55mm and 72mm (or higher) depending on the person.
…